2 years later…

Why the absence? Well, besides me being extremely ADD, always seeking some kind of new diversion and quickly forgetting the old, I decided to teach American Literature to 10th graders at a private school for the last two years. I thought that I would have time to write but I was so wrong. I have moved on again, this time helping my husband in our real estate investing business. I am curious to see if I would ever want to write about that experience, but I stalled getting into it precisely because real estate seemed so boring, so I am not sure if writing about it could hold my interest. What I do love about investing is that I can and did make close to three times my yearly teaching salary (ok, it was small) in only one transaction. And I also have more time to do the things I really enjoy doing, which brings me back to this blog.

Except now things have really, really changed in my cooking world. I had always eaten gluten-free, which seemed restrictive but now seems like a veritable buffet of options, considering that I have had to eschew a large majority of foods due to the onset of an autoimmune skin condition. I really have put the skin condition into remission through diet (a stricter version of paleo), but I am just now coming to grips that I may be on this restricted diet forever. Forever.

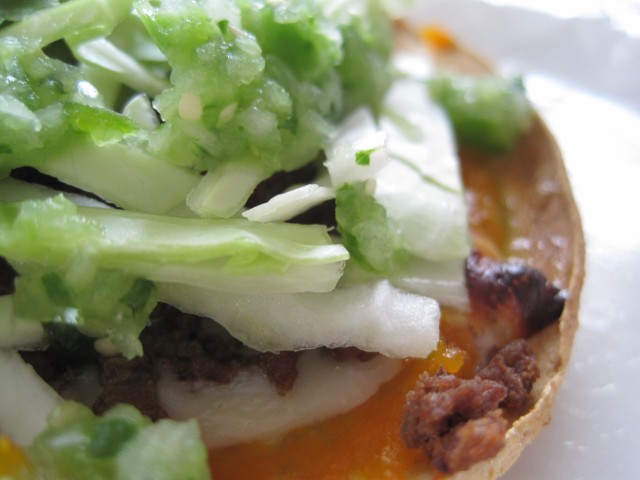
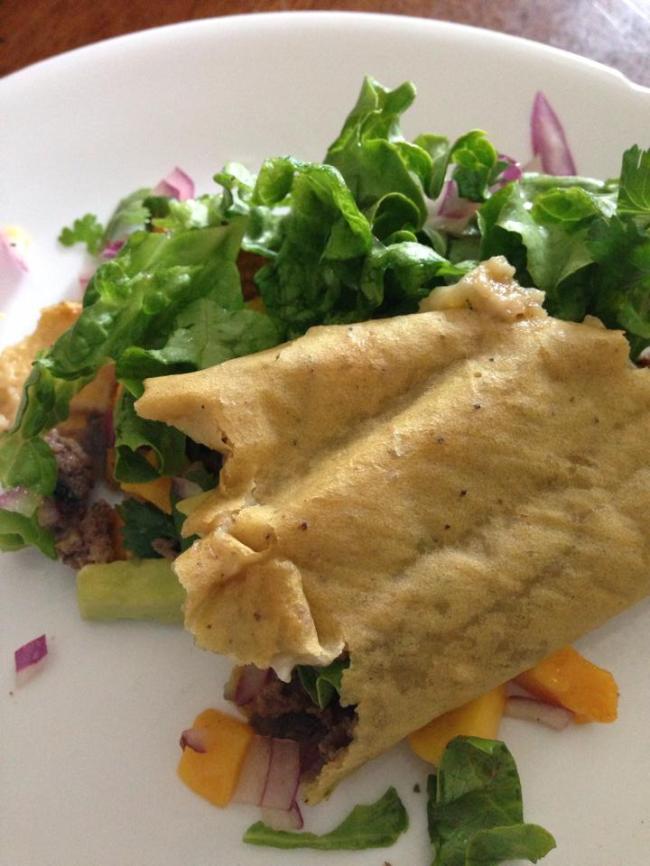
Thankfully, I have always loved fresh vegetables, so much of what I cooked and wrote about before still stands…minus dairy, grains, nuts, seeds, eggs, tomatoes, eggplant, peppers, etc., etc. I DID say it was restrictive. My new diet’s official name is the Autoimmune Protocol (or AIP), championed by PaleoMom and others fighting autoimmune conditions.  For a foodie, the restrictions sound miserable, but for me, all I had to do was google pictures of advanced stages of my particular condition (Hidradenitis Suppurativa…don’t google…I warned you) to be motivated to stick with it. So, until something drastic changes, all recipes on here will be AIP-ish (I have added back in some non-AIP foods with success), but hopefully it won’t be too noticeable, as it all centers around locally grown food in the first place. Image AIP-friendly tacos. That’s a plantain wrap holding it all together.

Posted in eating local, Uncategorized | Tagged , , | Leave a comment

Smokey, Spicy Split Pea Soup (Vegetarian, too!)

Do you have one of those foods that theoretically you like, but every time you try it in reality, you’re just not so sure about it?  Split peas are one of those foods for me.  I was cleaning my pantry out this week and came across a lost little bag.

This particular food is usually waiting for me come pantry re-organization time.  In the store, I see the bag of cute, brightly colored pulses and can’t resist buying it,  then proceed to ignore it for the next six months.  Why is this?  Maybe I needed a recipe change.  So this week I searched online to find recipes that got away from the overly-piggy versions I usually make.  (Don’t get me wrong…I love me some pig, but sometimes I just don’t want it in my soup.)

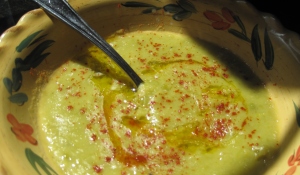
Simple is sometimes better, so I was attracted to this recipe here at 101 Cookbooks.  I’ll admit the beautiful picture is what really sealed it for me.  I mean, split pea soup is definitely not a sexy soup to photograph, as you’ll see below, so you can really appreciate the beauty of her picture.  Really, go take a look.

I changed one thing.  Instead of onions, I substituted 6 leeks I had from my CSA share this week.  Leeks in place of onions have never ruined a soup recipe, in my opinion, so I wasn’t worried about this change.  The result?  A much cleaner soup and I was delighted to be rid of the ham backdrop.  Yet…

…something was missing.  Maybe it’s because I’m a Texas girl, specifically raised a San Antonian, that the smoked paprika wasn’t quite enough for me.  It was pretty, but it lacked…kick.

So, for lunch the next day, I chopped up serranos, my favorite variety of pepper, and left out the olive oil drizzle and paprika.  I had my kick, but the serrano was a little too bright green for the earthy split pea.

Day three was the charm.  I was making a crockpot full of chipotle shredded beef and had leftover canned adobo sauce sitting on my counter.  It hit me as I was heating up the last dregs of soup – smokey, spicy chipotles.    I stirred a spoonful into my bowl and WOW.  Just wow.  And yum.

Smokey, Spicy Split Pea Soup (Vegetarian, too!)

1 lb. bag of green split peas

1 Tbsp olive oil

6 med leeks or 2 large onions, chopped

1/2 tsp. sea salt

1 lemon, juiced

1 can chipotle peppers in adobo sauce

Rinse and pick over your peas.  Heat the olive oil in a large stockpot.  Saute the leeks until softened and beginning to be translucent.  Add the drained split peas to the stockpot and cover with water about an inch over the peas.  Cook until softened, anywhere from 20 minutes to an hour.  Add the salt.   Stir in the lemon juice. (Note: 101 Cookbooks recipe had you salt the onions but I find myself reluctant to add salt before the peas are softened.)  Puree with an immersion blender, leaving some of the peas unblended.

After serving each bowl,  swirl a teaspoon of adobo sauce into the soup, using more or less depending upon taste.

I know. It's not that attractive.

Posted in eating local, Recipes for Fall, Recipes for Spring, Uncategorized | Tagged , , , , , | 3 Comments

Winter Squash Chalupa with Fresh Tomatillo Salsa

It’s no secret that I love fall.  So part of my culinary mission this time of year is to incorporate as many fall ingredients into my menu as I can.  This often translates into taking old favorites and re-inventing them. 

I grew up in San Antonio so my default food is Tex-Mex.  The trio of hot peppers, cool cilantro, and the bite of white onions can do no wrong, in my opinion.  So how to combine the flavors of fall with Tex-Mex? 

The 6 tomatillos included in my CSA share this week were begging to be made into salsa.  I also had a lovely red kuri winter squash in my pantry.  A few weeks ago, I roasted another red kuri, which made a beautifully orange-tinted mexican chicken soup (which I intend to post soon).  The roasted kuri had such a nice, smooth texture that today I began to think that perhaps the squash could act as a stand-in for refried beans.  A winter squash chalupa.  Hmmm…this just might work.

The results?  Very different, but surprisingly fresh and addicting.  The squash adds a sweeter taste than beans, but the tomatillo salsa balanced out the sweetness nicely.  I was frankly delighted to find another way to use winter squash.  My two taste testers, my preschooler and my fourth grader, gave it their marks of approval.  My three-year-old, however, ate hers with squash and meat only. 

Winter Squash Chalupa with Fresh Tomatillo Salsa

roasted red kuri winter squash

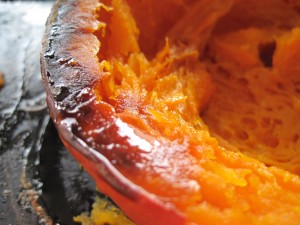
Preparing the squash:  Cut your squash in half and place cut halves on a roasting pan, skin side up.  Prick a few times with a fork and roast at 375F until tender.  If you use a red kuri, check after 3o minutes.  Cool and mash with salt and pepper. 

While you are waiting for the squash to roast, you can start preparing the rest of the chalupa ingredients.

Five-Tomatillo Salsa

There are lots of recipes for tomatillo salsa, but they almost always require cooking the tomatillos. I had thought for a long time that tomatillos had to be cooked, but a Rick Bayless recipe proved otherwise.   He gave the option for cooked tomatillos or using them raw. When cooked, the tomatillo changes from fresh and “green-y” tasting to a sweeter, sour flavor.   I prefer the fresh, raw taste.  And, as usual, I adapted the recipe to increase the onion and cilantro, just because those two ingredients make me happy.

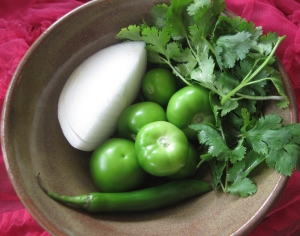
5-6 tomatillos, husked and well rinsed until waxy coating is removed

1/3 large white onion

1-2 hot peppers (serrano, jalapeno)

handful of cilantro

sea salt to taste

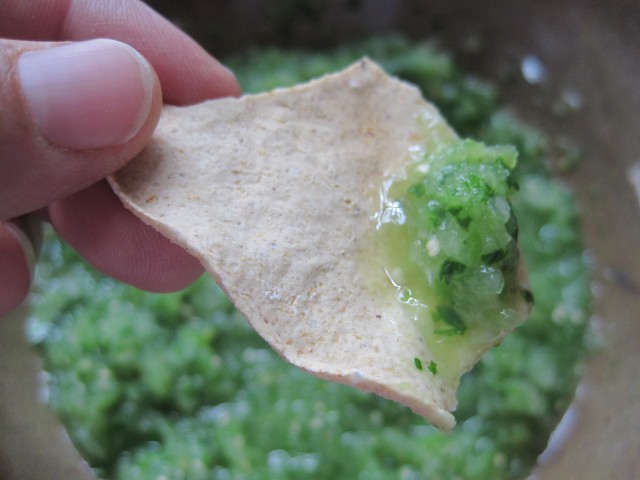
Put all of the ingredients in a food processor and pulse until finely blended.

tomatillo salsa

Winter Squash Chalupa

1 pound ground beef

2 tsp. chili powder

2 tsp. onion powder

1/2 tsp. garlic powder

1 tsp. salt

1 cup shredded white cheese

1/4 cabbage, shredded finely

Turn on the oven to broil.  Brown the beef in a frying pan over medium heat.  When browned, add the spices and salt and stir for one minute more.  Add 1/4 cup of water and turn to low.  Simmer until tender, about 10 to 15 minutes more.  You may need to add more water but the point is to end up with a moist, slightly saucy ground meat. 

Take each chalupa shell and spread a layer of  mashed squash.  Top with cheese and then the ground beef.  Put under the broiler until edges are crispy and the cheese is melted.  Watch carefully for burning! 

Top each chalupa with sliced cabbage and tomatillo salsa.  Make just before serving, as the squash will make the chalupa shell a little soggy if it sits for too long. 

Fall-inspired Tex-Mex

[A NOTE TO MY SUBSCRIBERS:  I was appalled the other day to discover that my entire posts get sent in the body of the email upon publishing.  I had thought only a link was sent.  The reason this appalled me is because I get rather hasty and eager after writing and usually hit the publish button before I finish editing.    Sorry for all of the typos and misspellings.  No more lazy leisurely post-published editing for me!]

Posted in eating local, Gluten Free, Recipes for Fall, Recipes for Winter, Uncategorized | Tagged , , , , , , , | 3 Comments

November Fruit Find: Satsumas

Let’s face it.  Locally grown fruit is one of the harder things to find in Houston’s farmer’s markets.  I check the harvest calendar periodically to see what I should be looking for, and November lists fruits like apples, pears, persimmons, figs, and melons.  That’s wonderful, but where are they?  Melons I still see at the markets, but apples?  No.

The problem with Texas harvest calendars is that Texas is a huge state, and we just don’t see the pears and apples in our markets as frequently as other parts of the state.  Persimmons might be found in some Houston markets, although I still haven’t seen any yet.  Citrus fruits are sometimes available this month.  And, behold!  Today, at the Sugar Land Farmer’s Market, I found these beauties, grown by the Secret Garden farm:

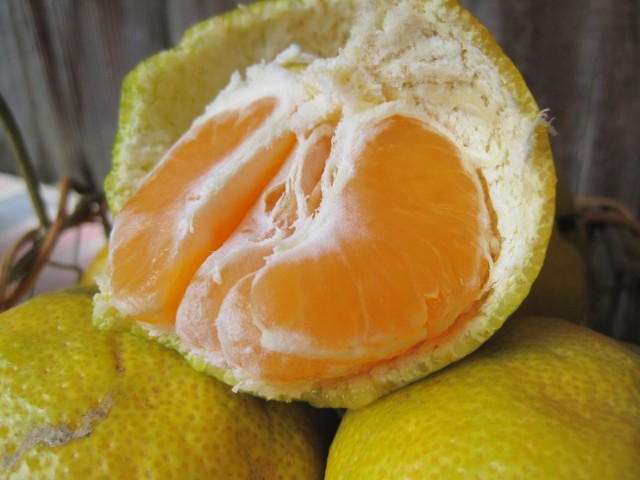
Satsumas - sweet, seedless, and easy to peel

Satsumas. Satsumas are a type of mandarin orange.  They are sweet, seedless, and super easy to peel.  Known to be one of the sweetest of the mandarins, they almost melt in your mouth.   Typically they are sold with the stems attached.  These were not, so I was hoping that I wasn’t buying some less desirables ones.  It turned out these were sweet and just right. 

Satsumas grown on the Louisiana and Texas coast seem to be different from ones grown in California.  Here, the skins are literally falling off the fruit.  If you read up on Satsumas, it is suggested to choose “tight skins.”  Not possible with these.  Just use the obvious tests when selecting – no dark spots, pick the heaviest ones.  They will be greenish this early in the season.  That is expected. 

I would never need a recipe using a satsuma.  Fruit like this just doesn’t make it past the eat-out-of-hand stage for me.  Yet, I was curious.  So I googled.  I found this one mentioned for clementines over and over, so I thought I’d link it here, especially as it is a flourless cake as well.  Why not use Satsumas instead?  I think my curiosity may get the best of me here.  I can imagine this might make a refreshing Christmas cake.

.

Posted in eating local, Recipes for Fall, The Art and Science of Clean Food | Tagged , , , , , , , | 2 Comments

Hot-n-Spicy Sweet Potato Mash

My farmer often emails us a preview of the week’s CSA share so we can gather our recipes.  She mentioned that she was about to dig up sweet potatoes, or rather was hoping to dig up sweet potatoes.  Below ground crops must be nerve-racking to a farmer.  I am hoping she found some, because I love sweet potatoes.  I especially love them when they break through the marshmallow and brown sugar stereotypes.  (For the record, it’s still a must at Thanksgiving.)

I happened to have some sweet potatoes I bought at the Sugar Land Farmer’s Market from a few weeks ago.  Sweet potatoes are so kind that way…you don’t feel the timer ticking down on them like greens and eggplants.  Usually I roast any vegetable when I can, but there are a few recipes where I really don’t want the deep carmelized flavor.  Sounds crazy, I know, but boiling is just right to make a sweet potato mash.  Even my kids love them this way, if I don’t go too crazy with the peppers.

It's all in balance...sweet, salty, spicy.

Hot-n-Spicy Sweet Potato Mash

3 – 4 sweet potatoes

1-2 hot peppers (jalapeno or serrano), whole, de-stemmed (1 for mild, 2 or more for hot)

3 tablespoons chopped cilantro

3 tablespoons salted butter

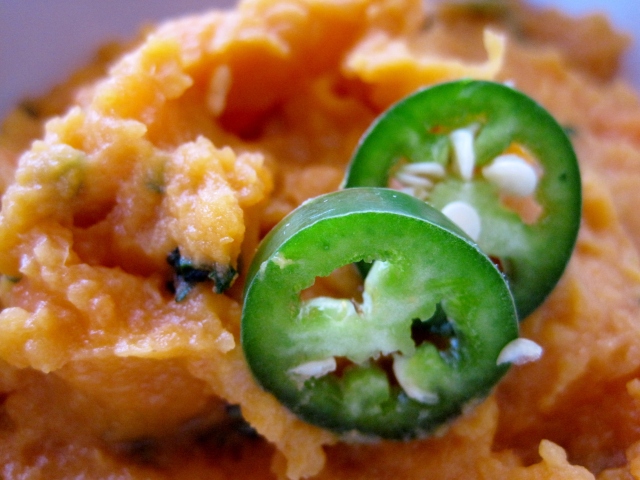
Chunk the sweet potatoes and add to a medium saucepan of salted water.  I keep the water level to just above the sweet potatoes, so the flavor doesn’t dilute too much.  Add the whole peppers and bring to boil.  When the potatoes are tender, add the cilantro and turn off the heat.  After the cilantro wilts a little, pour off the water.  Add the butter and blend with a hand mixer.  I suppose you could hand mash the potatoes, but the peppers break apart and distribute so nicely with a mixer, I’d go to the extra trouble.  Taste and adjust the butter and salt as needed.  Top with a slice or two of the pepper to serve as a warning to the diner of delicate palate.

Hot-n-Spicy Sweet Potato Mash

Posted in eating local, Gluten Free, Recipes for Fall | Tagged , , , , , , | 5 Comments

Baby Bok Choy Salad

Baby bok choy, toasted almonds, oranges.

 
 Last Friday kicked off the first delivery of my fall CSA season.  It’s been so strange reading other blogs around the country that talk of their CSA season coming to an end.  End?  Really?  We’re just beginning here.  I have nine more weeks to look forward to!
 

My share this past week had garlic chives, french breakfast radishes, various hot peppers, a huge bag of arugula, okra, baby bok choy, and purple long beans.  I’ve had a heads up that baby bok choy will be included this week as well.  We were also going to get sweet potato greens too, which I love, but a freakishly early frost killed them overnight.  Oh well…such is the risk with a CSA.

The baby bok choy was lovely–so lovely I didn’t want to cook it, even though I usually can’t resist the way the white parts deliver a watery crunch when sauteed.  I wanted a salad, but I didn’t want it stereotypically Asian, with a heavy soy-sauced and overly sweet dressing.  I remembered the orange olive oil and orange infused white balsamic vinegar I bought recently from Texas Olive Ranch. 

The dressing ended up with a splash of tamari, but it really just provides a balanced saltiness for what could be overly orange-y.  Segment an orange, toast some almonds, dice some onions (I only had white, but green would be better), and that’s that.  You might see a radish sticking out in my pictures.  I couldn’t resist. 

Baby Bok Choy Salad

In a mason jar, shake vigorously:

1/2 cup. orange infused olive oil

1/4 c. orange infused white balsamic vinegar

1 tablespoon sugar

1-2 shakes of tamari (or soy) sauce (I use gluten-free)

For the salad:

5 heads (more or less) of baby bok choy, chopped

1/4 of a large white onion, diced (or 1 bunch of a green onion, sliced, white and light green parts only)

1 large orange, segmented

1/2 cup toasted sliced almonds (I toast mine in a dry skillet)

Toss together the bok choy, onion, and orange.  Pour dressing over the salad.   Right before serving, mix in the toasted almonds. 

The bok choy is sturdy and this can sit awhile without becoming soggy like normal cabbage.  You may even prefer it wilted a little.  But do save the almonds until serving!

Posted in eating local, Gluten Free, Recipes for Fall | Tagged , , , , , , | 3 Comments

Preparing Winter Squash: Grill vs. Oven

Few foods symbolize a season like the winter squash.  As soon as bright orange pumpkins and deep green acorn squashes dot the markets, our wardrobes are suddenly given permission to take on the same fall colors despite the thermometer reading.  Granted, here in Texas the summer squash hangs on well into fall, but no matter.  Just seeing the hard, fat little orbs of dense squashiness has me thinking of all the ways to welcome autumn to my palate.

The irony of the name ‘winter squash’ has not escaped me.  I am assuming the fall-harvested squashes received their name from their blessed ability to keep over the winter.  I can only imagine how extremely valuable they were in winters past, before electricity and cold-storage came along.  In fact, the name “keeper” is added to some varieties, touting their ability to hold for long times in storage.

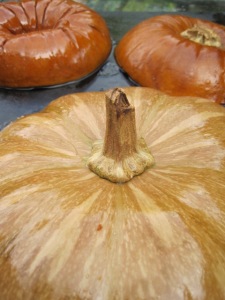
The two face off.

I bought a variety new to me from Stacey, called a “Taiwanese Keeper.”  Stacey usually only plants heirlooms, so I wanted to compare this squash, which looked very pumpkin-like in shape, although not in color, to a store-bought “Pie Pumpkin.”  These are the smaller pumpkin variety usually sold in the store as a cooking pumpkin, as opposed to the bin-sold jack-o-lantern types.  I was going to use just two methods…oven roasting and grilling.  I think steaming and boiling dilute the squash flavor, not to mention bypass the opportunity to carmelize the naturally present sugars.

Sliced for the grill, awaiting olive oil and salt.

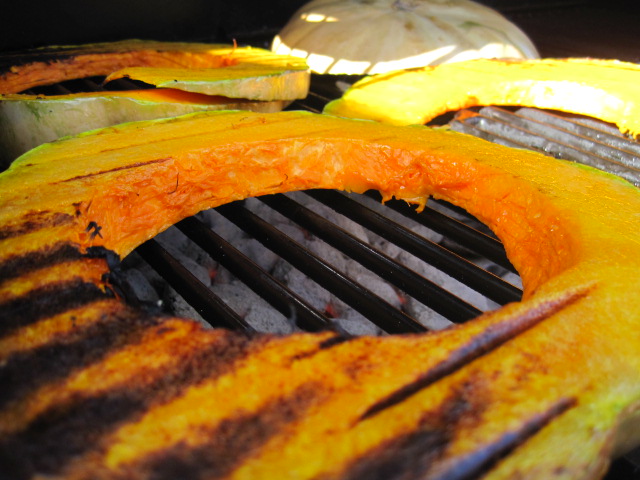
The Grill:  My hunch was that the keeper was going to be best on the grill and the pie pumpkin in the oven.  So I reserved the top third of the keeper for the oven, and used just about a quarter of the smaller pumpkin for the grill.  I began by slicing the squash into inch slices, or nearly so.   I learned a few things: 

a) Use a sharp knife.  Ugh.  I had to use too much force (my fingers are still here – yea!) and my slices were horribly uneven.  There is more than aesthetics at stake here.  It means that the slices are going to cook unevenly on the grill.  So if you decide to grill your winter squash, using a sharp knife might keep you from a trip to the E.R.

b) don’t start a project like this when you promise your kindergartener that you are going to meet her for lunch.  My squash was not ready when I noticed I was already late, so I had to make the unproven decision to move the squash away from the fire and hope that the indirect heat for 30 minutes was not going to ruin it.

c) if using a traditional grill, be sure and build your fire broadly.  I am sure there is a better way to say that, but what I mean is think about the space required to spread out the squash.  I made my fire with the image of the intact squash in my mind, forgetting how much space rings of squash would need once spread out.  This forced me to overlap some…not desirable.

With these lessons learned, here is the method:  Prepare your grill for medium-high heat, using the 3 second test.  (The heat is about right when you can hold your hand above (not on!) the grate for about 3 seconds comfortably.)  Slice your squash into 1 inch slices, brush with olive oil and sprinkle with salt.  Oil the grill and lay slices directly above the heat.  Flip after 5-10 minutes.  (Note: I could not find a consensus on time…I read everything from 5 minutes per side up to 30!  I think the reason for this is that each squash is different.  My pie pumpkin slices were ready much sooner than the keeper.)  Continue to grill until tender and nicely carmelized. 

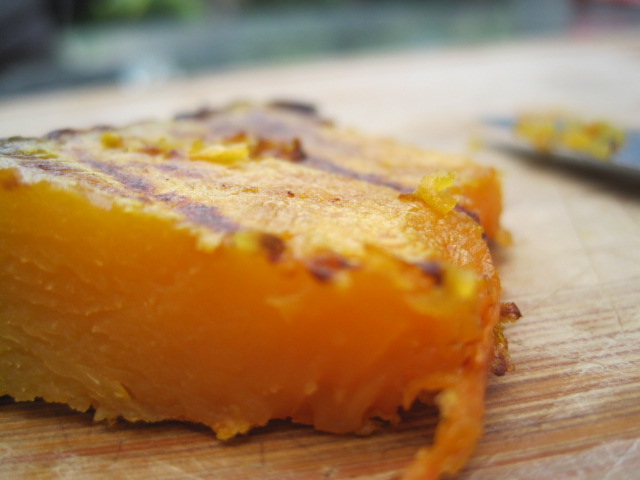
Like a steak!

Results:  America’s Test Kitchen I am not, so my methods weren’t perfect, but I was really happy with the way the keeper turned out.   I’m not sure exactly what the results would have been if I did not have to move it off of direct heat during my 30 minute kindergarten lunch, but what did turn out was perfect for cubing.  It made about 5 cups of cubed squash.  Lightly smoky, not overwhelmingly so.  Gently carmelized on the outside.  Firm, yet tender.  The pie pumpkin did not, as expected, stand out with this method.   

The Oven:  I’ve seen people roast whole, sliced and halved squash for the oven.  I think your method will depend on how you want to serve it.  I had puree in mind, so I just halved the pumpkin, minus a slice or two from the middle, scooped out the membranes and seeds, and put the cut halves face down on an oiled cookie sheet.  Had I wanted oven roasted squash for a side dish, I would have sliced, oiled, and salted the squash.  I can’t think of a single reason I would want to roast one whole.  Besides, you can’t roast the seeds that way!

Preheat your oven to 400 F.  Roast the halves face down for 45 minutes up to an hour or more.  You want to see a nice, brown, carmelized bottom when finished, and the tops will look collapsed.  Scoop out the cooked flesh when cool enough to handle. 

Results:  The pie pumpkin didn’t need pureeing at all.  Very smooth and sweet.  The keeper had a stringier, dryer texture, similar to a spaghetti squash, but when pureed in a food processor, it became silky smooth; not as sweet as the pumpkin but very mild and slightly butter-y.  The pie pumpkin lived up to its name…perfect for a smooth pie.  The keeper would be best as a pureed side dish or in a bread.  I was amazed at the yield of the keeper, too.  The top third made 2.5 cups of puree.  The pie pumpkin only yielded 2 cups. 

Conclusion:  The method you choose should have the end result in mind.  If you plan to use the squash as an eye-appealing side or in a savory dish which requires a second cooking, such as a white sauce lasagna, the grilling method will suit your purposes splendidly.  The squash will be tender yet still retain its shape.  I would also choose this method for a cold salad or quesadilla.   For desserts and purees, the oven method will work best.  The squash breaks down into a creamier texture and the deeply carmelized flavors will add a sweeter touch.

Posted in eating local, Gluten Free, Recipes for Fall, Recipes for Winter | Tagged , , , , , , , | 7 Comments

Cucumber-Cilantro-Lime Salad

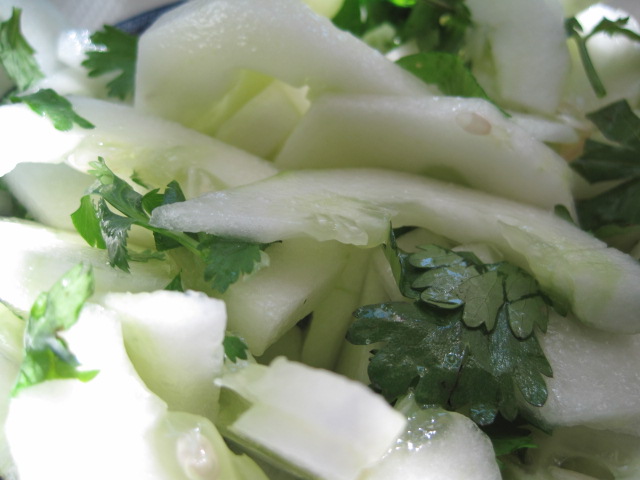
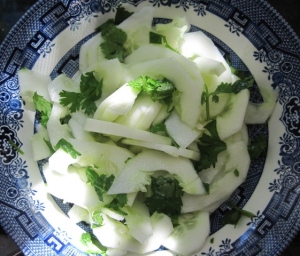
Cool and clean.

Ahhh, the crunchy, watery, hint-of-melon cucumber.  Cucumbers are still very abundant right now, but most of the ones I have found at the markets are very large.  Large cucumbers mean large, hard seeds. 

I’m usually a very lazy non-fussy cook.  If I can get away with not peeling or de-seeding tomatoes, I will.  And forget peeling potatoes.  Mark one for nutrition, right?  But the one thing I cannot stand is to chew hard seeds, so I usually look for small cucumber and zucchini.  That’s asking a lot this time of year…when summer produce seems to be doggedly (and thankfully) vying for attention in the size category.  The little bouts of rain have helped this along too.  So I’m not complaining at all.  But this recipe will require the extra step of removing the cucumber seeds if your cucumbers are as large as the ones I’ve been finding.

Cucumbers make me think of cilantro…two lovely cooling foods together.  You won’t find cilantro at the farmer’s markets right now, though.  While  I strive to include local foods in each meal, I am by no means a purist.   There are a few ingredients that I will buy year-round, in or out of season, and the first on my list is cilantro.  (Lemons/limes come in second.) 

I’m addicted, plain and simple, which is strange considering the history I have with cilantro.  I have never been a picky eater, but I mean it when I say I used to hate cilantro.  As in pick-every-leaf-out-of-tortilla-soup kind of hate.  I remember telling my parents in middle school to please order me anything that is not made with cilantro at our favorite Mexican restaurant.  Geez…the demands of a culinary inclined pre-teen.  Anyway, somehow between the 1980s and now, cilantro has topped my number-one-can’t-live-without-ingredient. 

This simple salad provides a nice counterpoint to spicy food.  I think it would pair equally well with Thai or Mexican.     

Cucumber-Cilantro-Lime Salad

1-2 cucumbers

1/2 cilantro leaves (or small handful)

1 large lime, juiced

sea salt

Peel and slice the cucumbers lengthwise.  Scoop out the seeds, then slice into half-moons.  Snip the cilantro with shears, or just chop.  (Snipping prevents bruising.)  Squeeze the entire lime over the salad.  Sprinkle with salt to taste.  Allow the flavors to blend.

Onions in any variety, diced very small, would be a good addition, for a different twist.

Posted in eating local, Gluten Free, Recipes for Fall, Recipes for Summer, Uncategorized | Tagged , , , , , , | 2 Comments

Better-than-Pumpkin Cushaw Pie [REVISED – Now with low glycemic option]

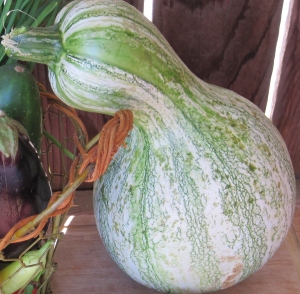
Most definitely not very pie-ish on the outside.

I know what you’re thinking.  This does not look like the basis for a better-than-pumpkin pie.  I wish someone would explain to me how this funny, pot-bellied, green-and-white-striped squash has heretofore escaped my food bank.  Or why it has not overtaken pumpkin in the pie category.  It is really that good.

My farmer, Stacey Roussel, is a Louisiana girl.  She first mentioned this squash to me when I was interviewing her for an article.  Stacey’s grandmother cooked by the seasons, so a cushaw squash pie will forever take Stacey back to her grandmother’s kitchen, in a house surrounded by Louisiana sugar cane fields.  Any squash that stirs that kind of memory is one I want to try, so when I spied this beauty at the Sugar Land Farmer’s Market, I scooped it up, aching arms be damned.  (Any suggestions for a portable cart?)  If I’d have known then just how great it would be, I’d have risked shoulder dislocation and bought them all.

So what exactly is this cushaw?  Also known as a kershaw or a Tennessee sweet potato squash, it is a crook-necked member of the Cucurbitaceae family.  It is very heat tolerant, so much so that it can also be planted in the spring.  It has a long history with the Native Americans and later found its way into the kitchens of the south, especially in Louisiana, Tennessee, and Mississippi.  You can still find cushaw pie as a menu item in some New Orlean’s restaurants.  [I recently made this recipe using a Long of Naples squash — results were fantastic as well.]

Cut up before roasting

I have nearly chopped off my hand cutting up a butternut, yet I sliced through the cushaw with ease, almost like slicing through a summer squash.  This was a relief.  Hacking away at a hard, unbalanced object is not my favorite part of cooking with winter squash.  Despite this softer skin, it surprisingly keeps a very long time if kept in a dark, cool place.   Yet another reason I will buy a bunch at one time if I see them again!  I might even try planting them, but my history of success in gardening is rather sketchy (remember the ‘pretend’ in my moniker?)

There are several different ways to prepare winter squash for recipes but I really have only two ways I like to make it.  If I am going to use the squash in baking or soups, roasting is the way to go.  If I want the squash to hold its shape, say in a pasta dish, salad, or quesadilla, grilling is my choice.  Both methods bring out the rich taste of fall, but steaming, microwaving, or boiling really do nothing to enhance the squash, and even dilute the flavor, in my opinion.

For the pie, I searched for recipes and finally adapted one I found from Chickens in the Road.  I was attracted to her recipe because she had already done the leg work of finding one best suited to the flavor of the cushaw.  Regular pumpkin pie recipes called for too much sugar, which would drown the cushaw flavor.   I did make a few changes though, like using heavy cream instead of evaporated milk (which I have a hard time trusting…and besides, why use anything else when you have cream?)  Bewarned…this recipe will be of a softer consistency when you use cream.  That is something I accept and even prefer, but if you are looking for perfect slices of pie that don’t slouch when cut, you may want to use the evaporated milk. [UPDATE:  This Thanksgiving, I actually took the time to let the extra water drain from the puree in a strainer.  Forget the above comments about evaporated milk.  The cream version was perfectly firm…I am a dedicated fan of the strainer now.]

I found this pie to be so much better than pumpkin, that I’m afraid that I have ruined my taste for the Libby’s classic.  Only one kid out of five said that pumpkin pie was better.  There is so much depth to this pie.  Rich spicyness, perfectly squashy, balanced sweetness…I just can’t imagine why this is not more widespread.  Here’s to heirloom growers!!!

I’ve now included a low glycemic option. I find that when I eat cane sugar, I crave more and more sugar. If I use a low-glycemic sugar, like coconut palm sugar, I am not turned into a sugar beast.  Since going low/no cane sugar, we all prefer my new version with only a 1/3 cup sugar. It’s sweet enough to qualify as dessert, but not overwhelmingly sweet.

Pureed, roasted cushaw squash. It’s very light in color.

Better-than-Pumpkin Cushaw Pie (adapted from Suzanne McMinn)

The Crust:

Prepare your favorite recipe for pie crust.  My pictures don’t show any crust.  I usually only go to the trouble of making a gluten-free pie crust at Thanksgiving and Christmas.  The reward of flavor/texture aren’t equal to the time and expense, in my opinion.  When I do make crust, I’ve had the best success using the King Arthur recipe for Gluten-Free Pie Crust.

Preparing the Cushaw:

Preheat oven to 375 F.  Wash and cut the cushaw, spread out on a roasting pan, cover and bake for an hour or so, checking for tenderness.  Cushaws will shred even when well roasted, much like a spaghetti squash, but don’t worry.  A quick swirl in a food processor will puree the cushaw to a lovely consistency.

Taste it’s pure flavor straight from the oven. A real treat.

You will have enough cushaw to enjoy a few chunks straight from the oven with just a little butter and a sprinkle of salt.  Even my three-year old couldn’t resist.  If you’ve ever choked down an acorn squash just to be polite, I promise, this is a completely different experience.

This next step is optional, although I recommend it.  Sometimes I don’t do it because I am impatient, but if you like a tighter custard filling, you can take your puree and pour it into cheesecloth or tight strainer suspended over a bowl.  Drain the puree until thickened.  Think canned pumpkin consistency and you’ll know when it’s ready. I’ve tried this recipe with great success using other winter squashes, such as the Long of Naples squash, and some absolutely require straining. Each squash varies in its natural water content…the Long of Naples is extremely high in water.

The Pie:

Turn your oven to 350 F.

It looked exactly like applesauce.

2 cups prepared cushaw squash puree, drained
2/3 cup brown sugar [For a low-glycemic pie, use 1/3 cup coconut sugar only –it’s perfectly sweetened]
1 teaspoon ground cinnamon
1/2 teaspoon ground ginger
1/2 teaspoon salt
1/2 teaspoon ground nutmeg
1/4 teaspoon ground cloves
3 large eggs
1 teaspoon vanilla
1 1/4 cup heavy cream [I’ve been reducing this to 1 cup for a firmer pie]
pastry for single-crust pie

Combine cushaw squash puree, brown sugar [or coconut sugar], cinnamon, ginger, salt, nutmeg, and cloves in the bowl of a stand mixer or a medium sized bowl.  Add eggs and vanilla then beat lightly with the whisk attachment or with a hand whisk.  Stir in heavy cream.  Mix well.  Pour into a pastry-lined pie plate.  Bake on the lowest oven rack at 350-degrees for 60 minutes (until a knife blade or toothpick comes out clean). I usually look at the pie at 60 minutes — if the top hasn’t puffed up all the way, it needs more time. Chill before serving to firm up.  Or if you’re like me, you can eat it warm and soft.  It is said that pumpkin-y pies taste better the next day but with seven eaters in my house, we’ll never know.

Depth, spicy, balanced sweetness.

Posted in eating local, Gluten Free, Recipes for Fall, Recipes for Spring, Recipes for Winter | Tagged , , , , , , , , | 19 Comments

A True Tale of a Vainglorious Girl, A Hungry Boy, and a Slimy Sausage

It was gonna be good, y’all. 

I knew I had found a way to entice my husband to eat not just a polite amount of squash and eggplant, but a whole, whole bunch.  Think Cajun.  Add shrimp.  And pull out the big guns…a secret weapon bound to send any Texas boy for seconds.

So I chopped.  I was so very proud of myself.  I even hummed while chopping.  You remember those beautes from Saturday?  Zucchini, yellow squash, patty pan squash, eggplant, and the cute little peppers?  Add in a large onion, 1/2 a bulb of garlic, and 2 celery stalks.  That’s a whole lot of choppin’.


John was eyeing the whole cutting board with doubt.  I could tell he was thinking of substitutes for dinner so I needed to bait the hook.

“Don’t worry.  I’m adding shrimp.”  Some flicker of interest.  His eyes rolled over the mounds of eggplant and squash again, and his look settled into one of faithlessness.  I went in for the kill.  “I’ve got sausage.”  Pause for effect.  “Jalapeno sausage.”

After that, he stopped rummaging through the freezer.

I carried on, sauteeing onions, celery, and peppers.  I added in the garlic, the eggplant, the squash.  I salted, I cayenned.  I had locally grown jasmine rice in the rice cooker steaming away.  This was going to be great.  My next step was to throw in the tempting aroma of cooking sausage to melt any remnants of apprehension in John.

I opened the Prasek‘s package, that yummy stuff from down the road, grabbed a link, and paused with the sausage mid-air. It felt a little slimy.  It was a brand new package, vac sealed, so I checked the sell-by date.  Nov. 13.  That was good.  I sniffed it.  It smelled appropriately smoky, no putrid odor, at least.  I glanced at John.  I looked at my beautiful vegetables.  And in the way that one senses that a whole chain of events are resting on one single action, and that merely by using speed you can avert a consequence, I quickly chopped it up and threw it in the pan.  No overthinking it here.

At ease, I was stirring, adding in the tomatoes and broth, when I realized that one sausage link was not enough.  I had shrimp, yes, but it was the sausage that was going to turn this into my man’s new favorite meal.

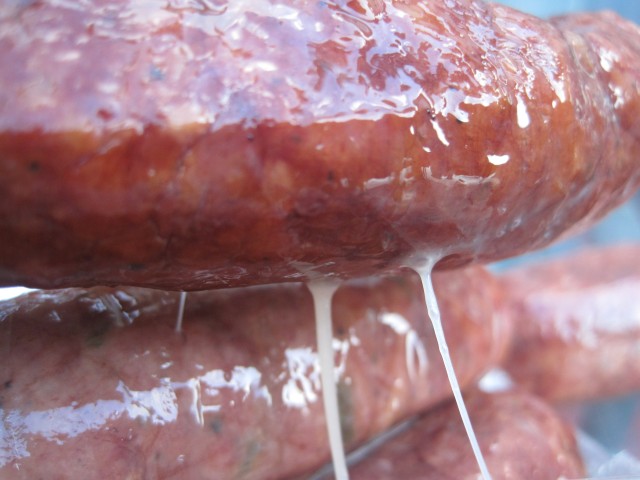
Back to the package for another link.  This time, though, a string of slime followed that link for an entire twelve inches before breaking.  A sinking feeling settled in.  This could not be good.  My hand was covered in slime and I not only had to rinse the link off, but actually soap up my hand to remove it.  Somewhere, though, I was pulling for normalcy.  Hadn’t I seen this before?   Maybe it was the type of casing.  I sniffed the bag again.  It smelled okay.  Then John spotted me smelling the bag. 

“It’s fine,” he stated firmly.  “Really.  You’re cooking it right?”

“Well, yes, but I’ve just never seen slime like this before.  But it smells alright.” He nodded with assurance, mumbling something about slime being normal and went back to his computer.  And I went for my laptop and googled slime on sausage.  The results were not reassuring, but…well, my precious vegetables!  I decided I’d call Prasek’s.  Maybe it was some kind of slimy variation of casing that I hadn’t noticed last time.  I looked at the clock.  Maybe, just maybe the fine people at Pracek’s were still there.  But what were my chances at 6:35 p.m.?

“Um, yes ma’am, let me ask someone who knows.”  Yes! 

“Y’ello!  You got a question?” he drawled in a friendly way. 

I described my sausage in familiar, casual terms…fishing for reassurance.  “Y’know…he-he…the way that jalapeno sausage, um, gets kind of slimy?”

“How slimy are we talking about?  Is it clear slime or milky-white?

“Milky-white.  Is that bad?”  A long pause.

“Where’d you buy it?”

“[Unnamed Large Grocery Store Chain].”

“Hmmm….we’ve been getting quite a few calls lately, all from people buyin’ there.  I don’t know their chilling practices but if they let it get warm and then cool it again, it will go bad.  I’d take it back.”

I was getting desperate.  “Um…the slime is only like a foot long.  Isn’t that normal sometimes?  What if I cook it real good?”

He chuckled.  “Well, you could cook it but I wouldn’t eat it.  I would take it back and get my money.”

“What did you expect him to say,” said John after I hung up.  “We’re cooking it.  It will be fine.”  So, again, looking at my giant saute pan of vegetables, I threw in the shrimp.  Expensive shrimp.  There.  Decision made.

Except for maybe one last search on Google, for the children’s sake.  Slime on sausage normal.  Biased search entry, I know.  This time, I searched charcuterie forums, sausage specialty sites, and even scanned an academic paper discussing the differences in animal casings. 

John interrupted my frantic page clicking.  “We’re eating it.”  I was just about to acquiesce when my eyes fell on a Google return from a food safety site, highlighting the phrase “the amount of slime indicates the numbers of bacteria.”  Okay, that was it.  Linking the quantity of slime present to the bacteria counts broke me.  Besides, I was beginning to think that it wasn’t smelling too hot either.

I looked up at John.  He looked at my face.  He’d seen that look before.  “We’re eating Chik-fil-A, aren’t we.”

Epilogue: 

Before the sun went down, John helped me hold the remaining slippery sausages for my pictures.  Even he looked genuinely grossed out.  This was good, I thought.  At least he won’t be disappointed, or think I’m overreacting. 

We decided I would go the store for a refund, and he’d feed the kids from random stuff at home instead of Chik-fil-a, mourning the loss of not only time and effort, but also a whole lot of money in that pan.

I returned later to find he’d eaten two bowlfuls and said it was fantastic…too bad I missed it…and something about the eggplant really making it something.  I am telling the truth.  I’ll let you know if he’s still alive tomorrow.  Meanwhile, here’s a shot of the sausage.  Enjoy.
Bon appetit!
Posted in eating local, Failures, Funnies, and Flops, Thoughts and Stuff | Tagged , , , , , , , | 7 Comments